Linework
Linework for the Survey Area
1. Creation of Initial Linework in QGIS using Survey points import - (Ram, System 4)
Initial Linework in QGIS is started by surveyor with the knowledge from the Field. For this step, points are simply imported into the QGIS from the field text file (.csv or .txt). CRS needs to be TM-AUSPOS. The box of “First record has field names” shall not be ticked. In Point Coordinates, select the correct field for x, for y and for z (usually “field_2” for x, “field_3” for y and “field_4” for z). Points can be styled using the “Categorized” style in “Symbology”, using “Field_5” as value, or using a Rule-based symbology using the category (field 5) as filter.
Linework is created by connecting points having same description and belonging to the same physical feature. All line and polygon features are created as lines.
The Initial Linework for the Survey Area is also stored temporarily in
D: > AVSM > Zone-Survey number (eg RZ-01) > Survey Area (eg J) > Temporary WD
Note: The line shapefiles / Geopackages shall be in CRS: TM AUSPOS
2. Creation of final working drawing Shapefiles / Geopackages - (Selvarani, System 1)
Final working drawing Shapefiles / Geopackages are created from the Initial Linework of Survey Area.
As the Surveyor draws all features as lines (both for lines and polygons features), the following actions shall be done:
1. If features are lines:
• Export the shapefile / geopackage into the final working drawing folder (Final WD), in separate folders according to its type (e.g. BLDG, FENC, ROAD, etc).
The CRS for the export shall be EPSG:4326 - WGS 84
2. If features are polygons:
• Lines shall be converted into polygons:
to do it, first click on the layer to be converted to make it active (e.g. WD-CZ-01-F-LL84_V-BLDG-MHOL------E), then go to “Vector” Menu, click on Geometry Tools, click on Line to Polygons:
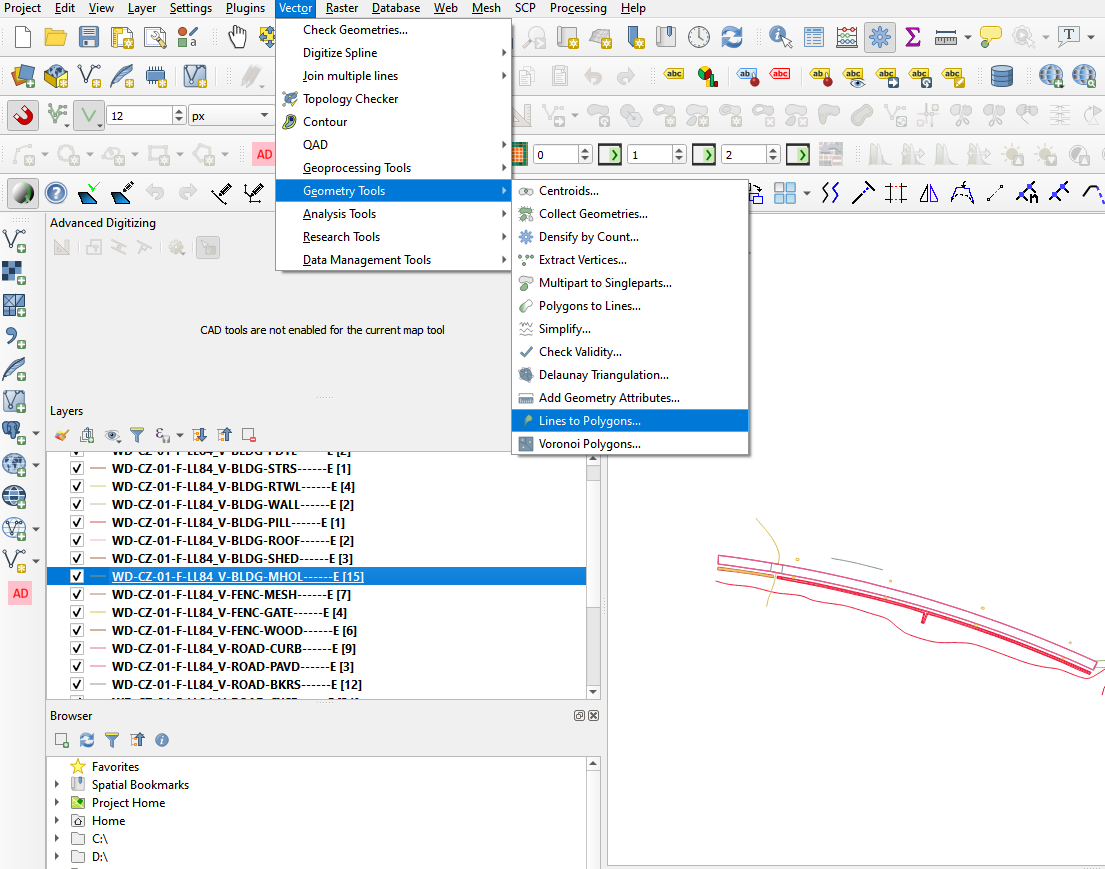
The new window for “Lines to Polygons” conversion will appear:
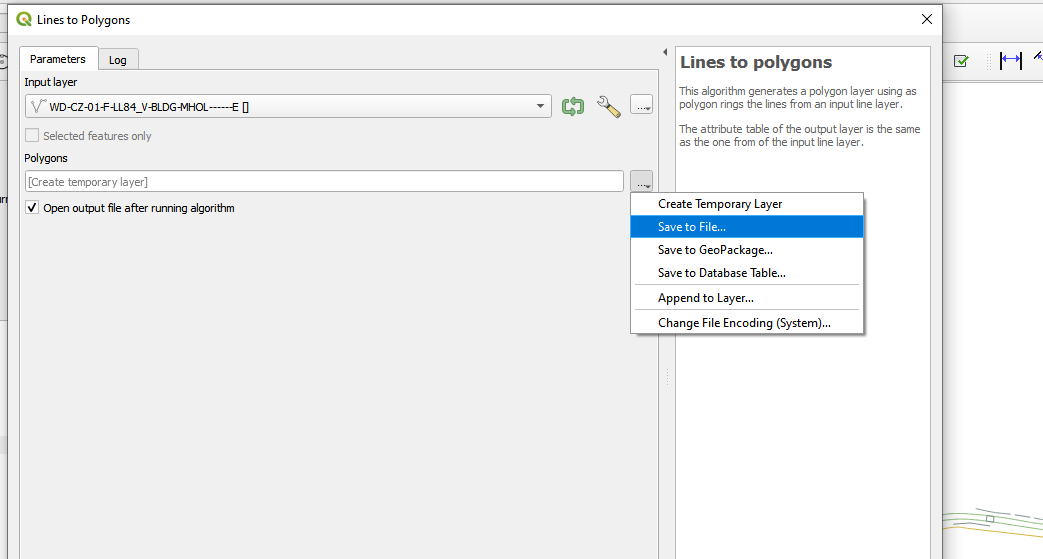
• Always cross check the input layer, to make sure that the input layer is the active one
• Save the output in a temporary layer
• The temporary layer will be listed in the list of layers, it shall be exported to the saving location as D: > Survey > Zone-Survey Number > Final WD > Survey Area SHP (eg . D: > Survey > GB-01 > Final WD > A-Shp)
The CRS for the export shall be EPSG:4326 - WGS 84
Once all the shapefiles / geopackages are exported in Final WD, for each of the newly exported layers the Topology Checker Tool shall be used.
Linework for the whole Survey Zone
1. Merging Shapefiles / Geopackages - (Selvarani, System 1)
A copy of the Zone Master shapefiles / geopackages are taken from System 4 and stored in Temp Folder on Desktop in System 1.
Master shapefiles / geopackages are merged with the Survey Area shapefiles / geopackages:
• To do it, go to “Vector” Menu, click on Geoprocessing Tools, then click on Union:
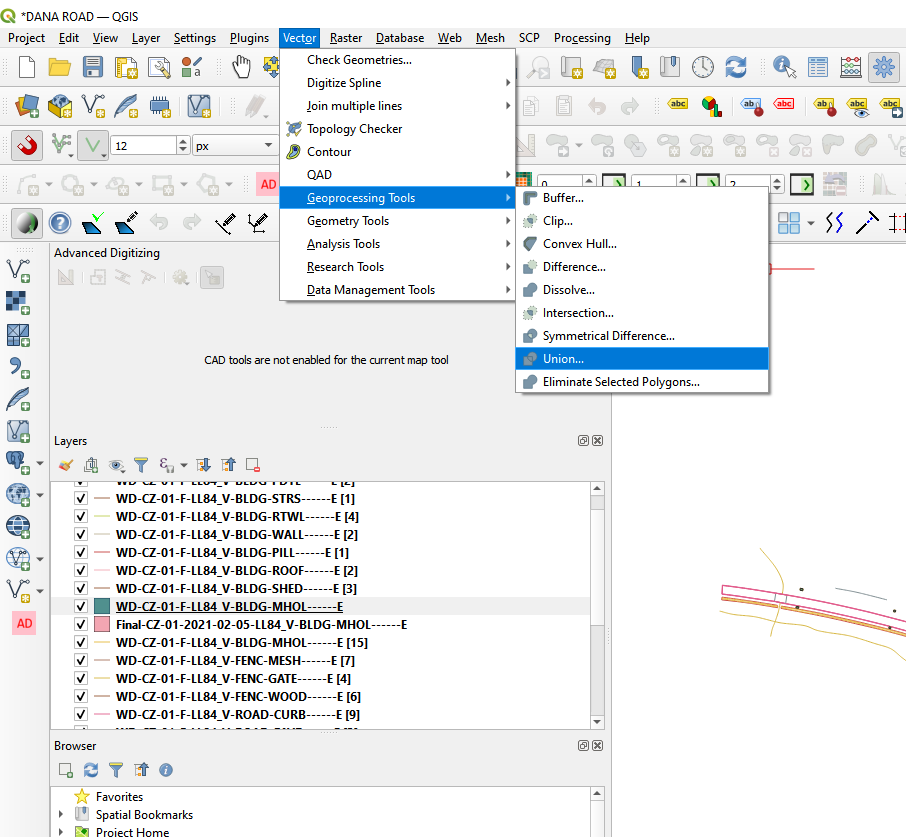
The new window for “Union” will appear:
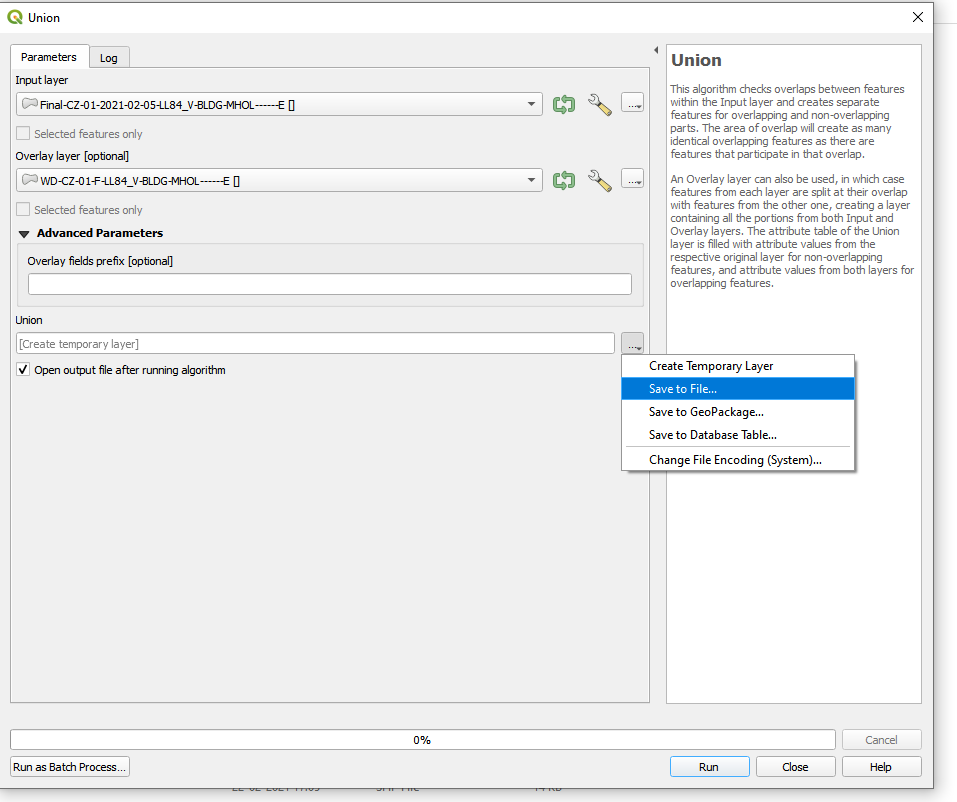
• To make sure that the right geometry is generated by this process (“line” type, not “Multiline”, and similarly “Polygon” type, not “Multipolygon), we need to always keep the Master shapefile (e.g. Final-CZ-01-2021-02-05-LL84_V-BLDG-MHOL------E) as Input layer, and the Survey Area shapefile as Overlay Layer (e.g. WD-CZ-01-F-LL84_V-BLDG-MHOL------E).
• (The output can be saved to a file, as the CRS should already be EPSG4326 – WGS84.)
2. Storing Shapefiles / Geopackages - (Selvarani, System 1)
Save the merged shape file in the correct location in Final folder as D: > Survey > Zone-Survey Number > Final (eg . D: > Survey > GB-01 > Final)
Date in the name of Final Shapefile / Geopackage needs to be updated.
Once the merging operation is completed, the copy of Master shapefile / geopackage is deleted from the Temp folder.
3. Topology check of merged shapefiles
The topology checker is applied again on the merged shapefiles / geopackages.
The “id_field” shall be removed from the attribute table.
4. Archive and replace the Master Shapefiles / Geopackages (Ram, System 4)
Archive the previous master shapefiles / geopackages on system 4, and copy the new merged shapefiles / geopackages in its place.
*Then delete the Merged Shapefile / Geopackage folder from System 1.
*
5. Note about Shapefiles and Geopackages
All the above works are usually done using shapefile format, in QGIS latest version (3.16.3).
The Geopackage export is done in QGis versions older than 3.12 (e.g. 3.4, 3.6, 3.8, 3.10) so that the lines are not saved as “Multilines” but as “Lines”and polygons are not saved as “Multipolygons” but as “Polygons”. This is very important to be noted, as Gisaf database does not accept the Multipolygon and Multiline geometry types.
A different way to create "Polygons" is to use the command Vector -> Geometry Tools -> Multipart to Single Parts and apply it to the layer: from "Multipolygon" it will become "Polygon" (check in layer Properties).
As on 13 March 2021, Gisaf can accept Multipolygon layers, because the command "Multipart to Single parts" has been integrated into the importing command (see Redmine ticket #11691)
Creating 3D Shapefile/Geopackage
While creating a Shapefile/Geopackage, the File name/Database-table name, Geometry type and CRS have to be entered.
In order to create a 3D Shapefile/Geopackage, the additional dimensions "Z(+M values)"/ "Include Z dimension" has to be ticked: this way the 3D Shapefile/Geopackage is accepted by Gisaf without errors, otherwise the Shapefile/Geopackage can't be imported in Gisaf because the Z dimension is missing (the geometries in the database are all 3D).