Export from QGis to CAD » History » Version 20
« Previous -
Version 20/35
(diff) -
Next » -
Current version
Giulio Di Anastasio, 06/05/2021 17:10
Export from QGis to CAD
An algorithm has been created by Selvarani, to see the whole process click here:
https://redmine.auroville.org.in/projects/gis/wiki/Automatic_export_from_QGis_to_dxf
QGis Graphical Modeler: An algorithm to automatically export data directly from Gisaf to .dxf format (CAD)
- Login to PostGIS
- Directly from the Gisaf server, load all the layers which need to be converted into .dxf format
- Go to Processing Menu, click on “Graphical Modeler” (or Ctrl+Alt+G)
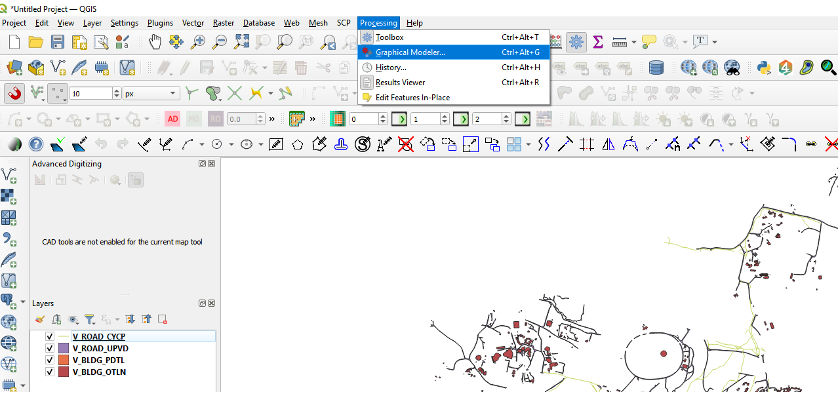
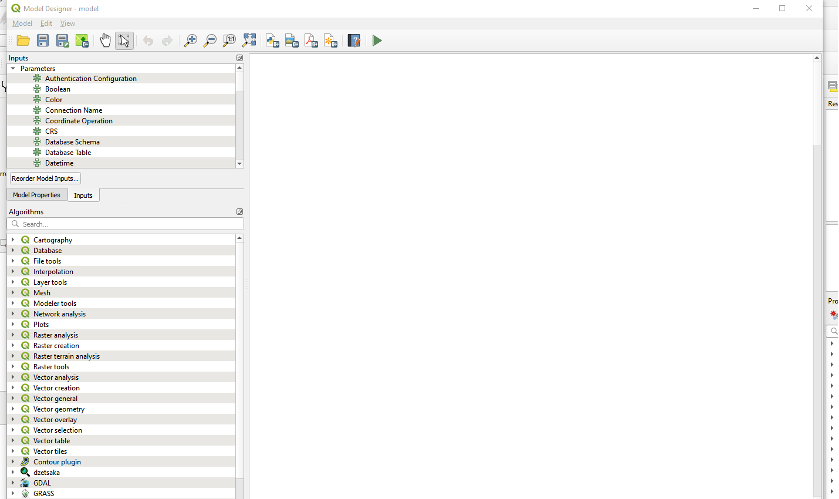
- The “Model Designer” window will open:
The final model will look like this:
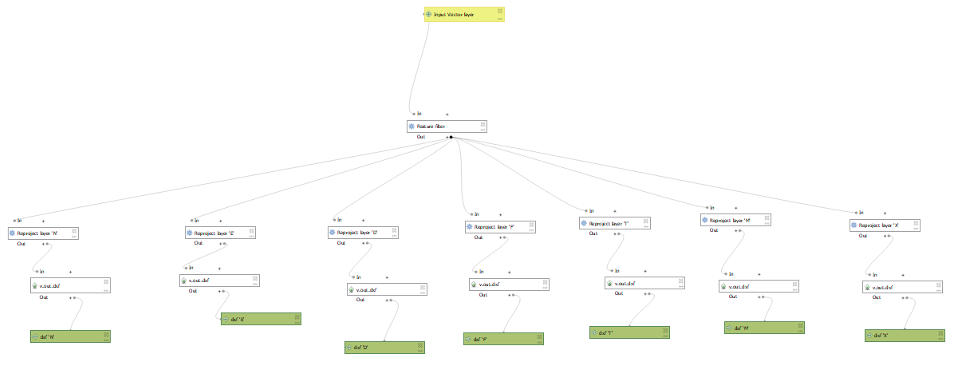
Below, the explanation on how the algorithm has been created.
- An input to the algorithm is needed: go to “Inputs” tab and double click on “Vector Layer”
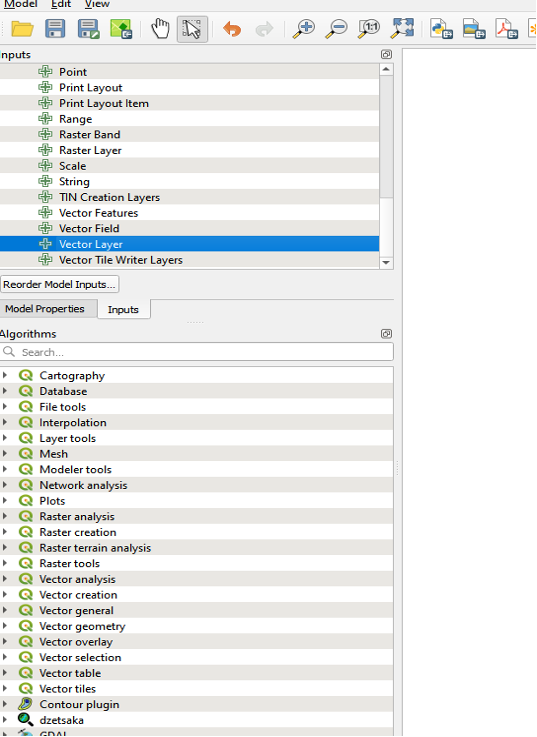
The window “Input Vector layer Parameter Definition” will open:
- in “Description”, enter “Input Vector layer”
- in “Geometry type” select “Any Geometry Type”
- Click “Ok”
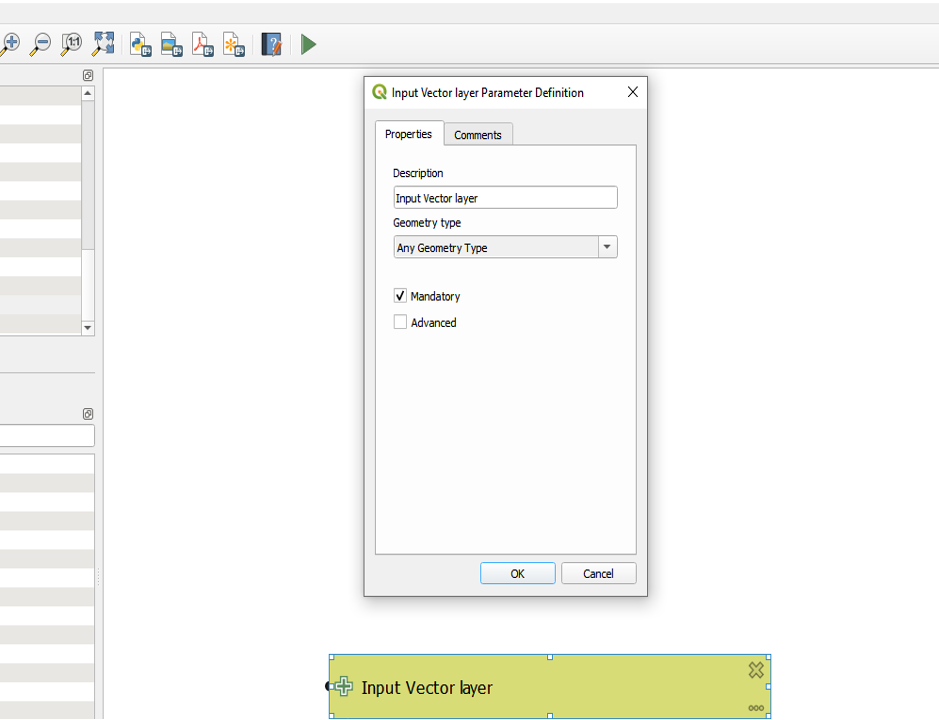
Input is created as above.
As a second step, features need to be filtered, because some layers have different “Status” (E, D, F, etc. as defined in CSR Geomatics CAD Layer Naming Standards):
- in the Algorithms panel, type “filter” in the Search Box: this way, all existing algorithms related to “filter” will be listed
- double click on “Feature filter”
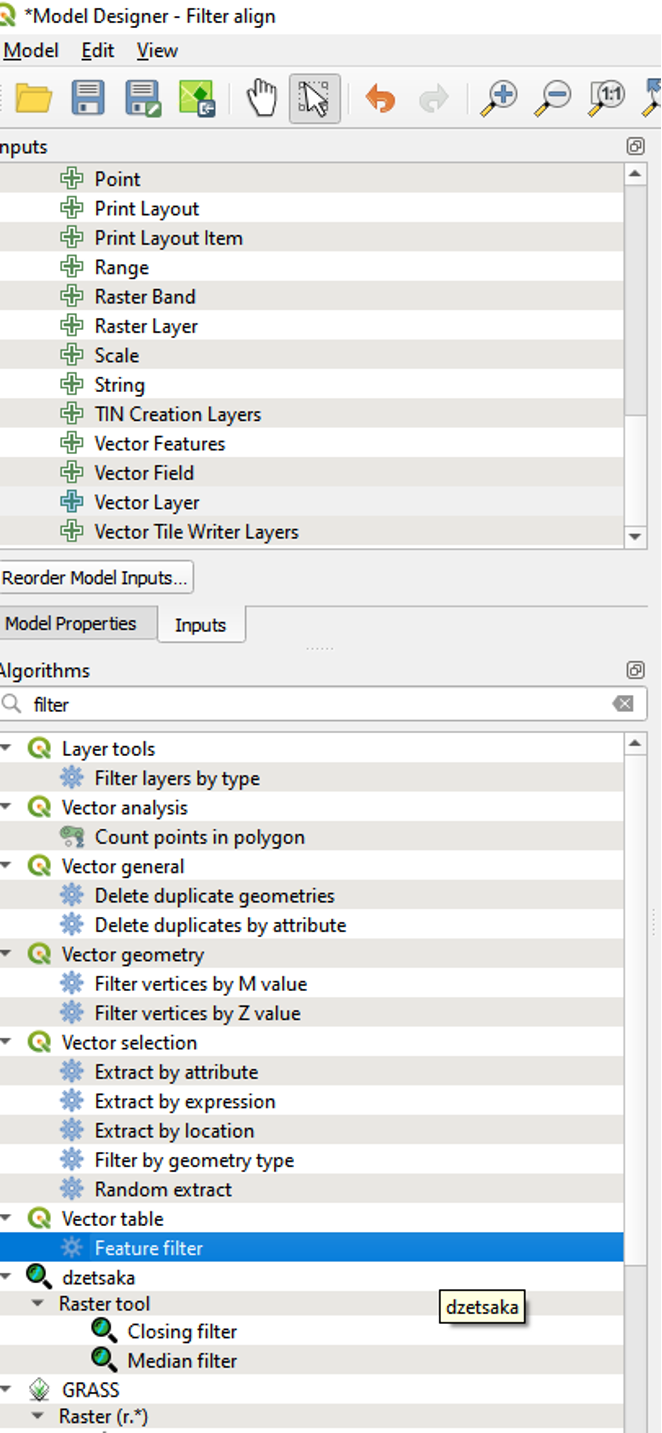
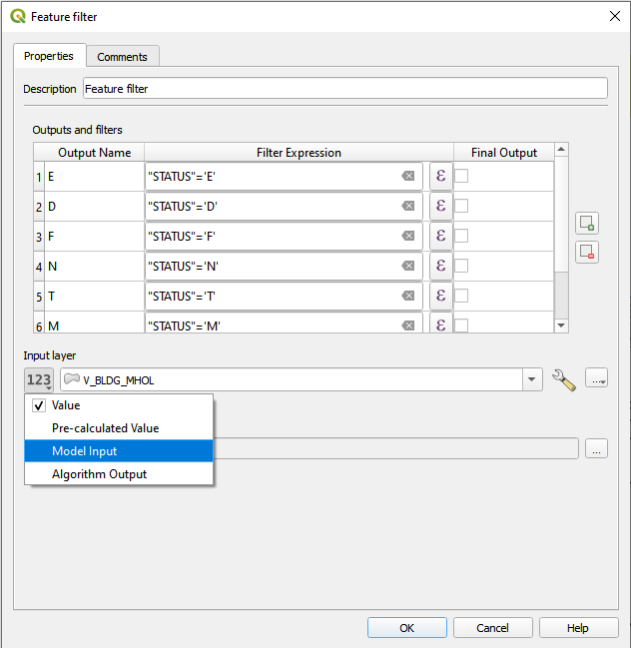
“Feature filter” window will open:
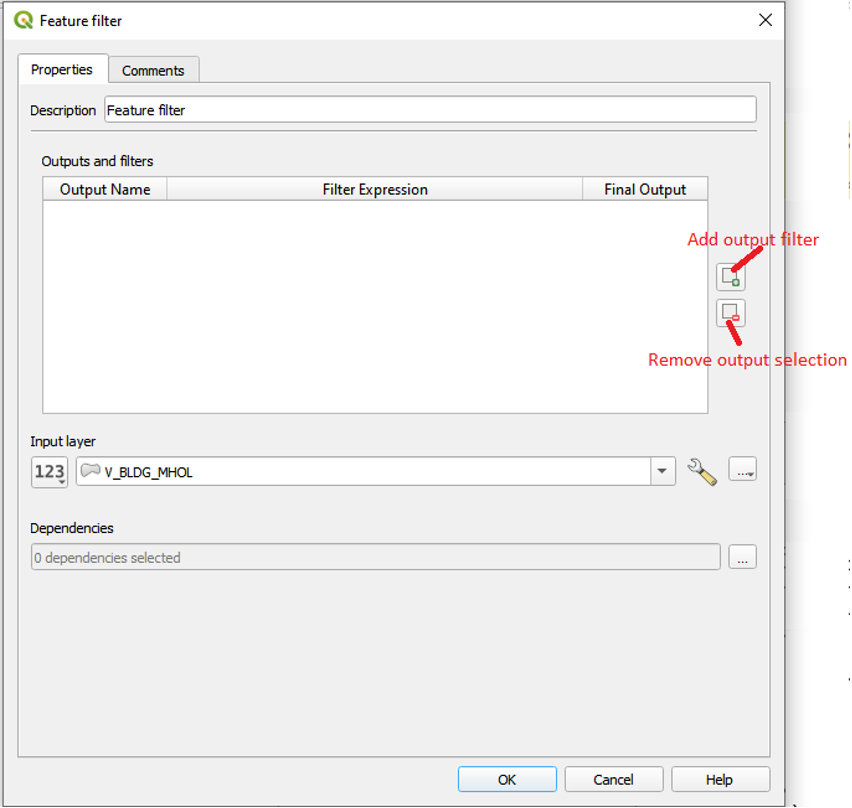
- Click on ‘Add output filter’ icon
- Click on expression button
to write an expression for the filter.
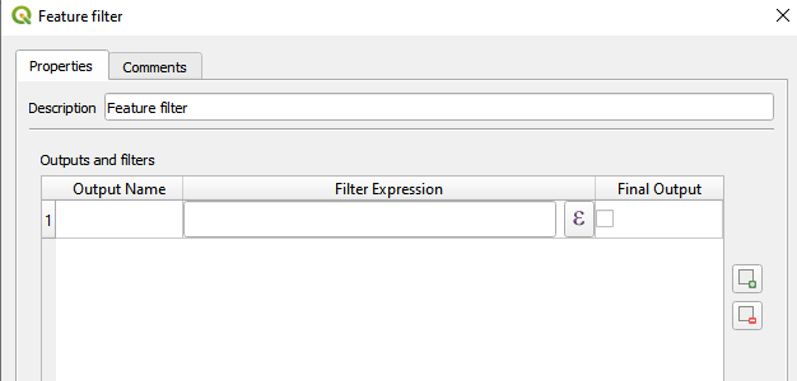
- The Expression dialog will open, type the criteria for defining the filter, e.g. “STATUS”=’E’

- Click “Ok”: the expression is added in the table of “Outputs and filters” as below.
- In the field “Output Name”, type in the output as ‘E’.

- Repeat the same steps for all other status (Like D,F,N,T,M and X)
- Click on the “Input layer” button and select “Model Input” in the drop-down list, it will change to “Input Vector layer”. Click on “Ok”

The model will look like below:

As the input layers were taken directly from Gisaf server, where their CRS is WGS 84-EPSG:4326, all outputs need to be reprojected in TM AUSPOS CRS, because the CAD overall survey map is in TM AUSPOS:
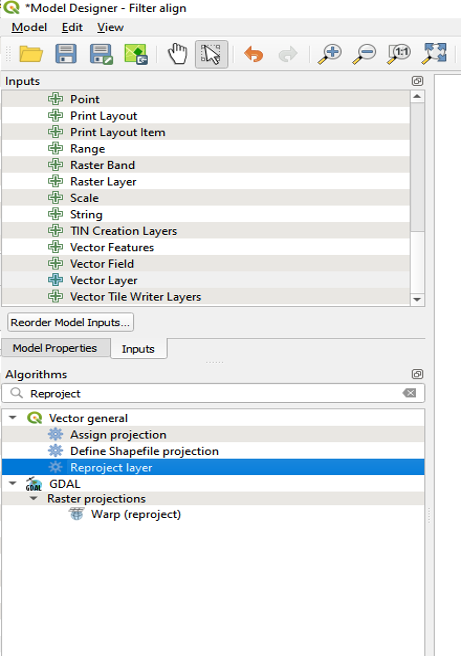
- Go to “Algorithms” panel and type “reproject” in the Search Box: this way, all existing algorithms related to “reproject” will be listed
- Double click on “Reproject layer” under “Vector general”
The “Reproject layer” dialog will open:
- In the “Description” box type “Reproject layer ‘E’”: this will reproject only the features with status ‘E’
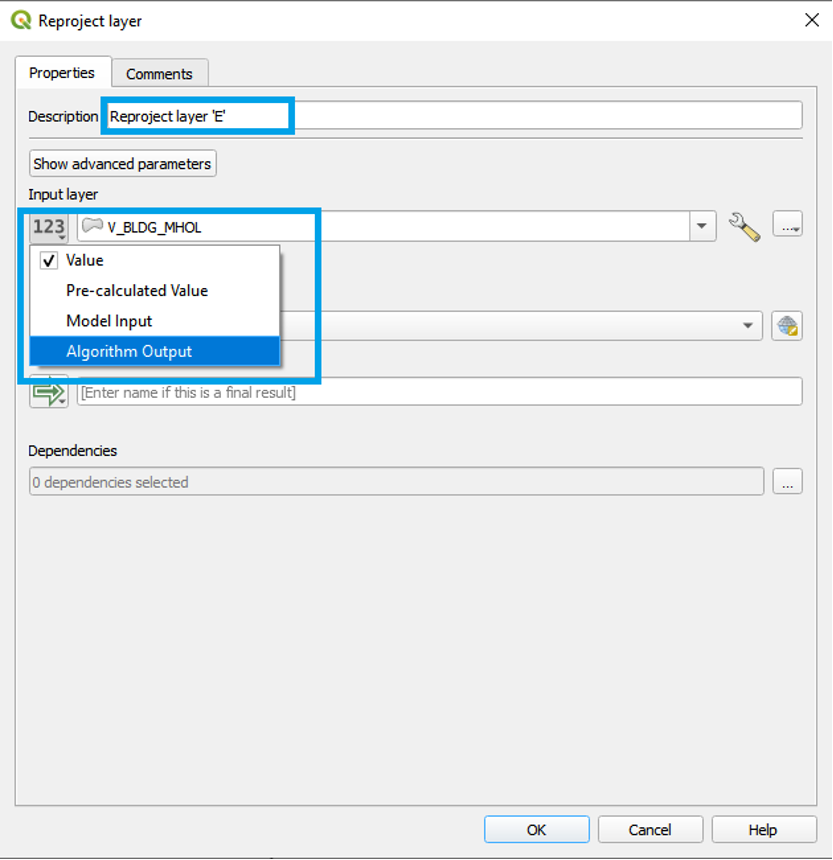
- In “Input layer” drop-down select “Algorithm Output”, click on the related box and a list of all available algorithm outputs will appear.
- In “Using algorithm output” select ““E” from algorithm “Feature filter””
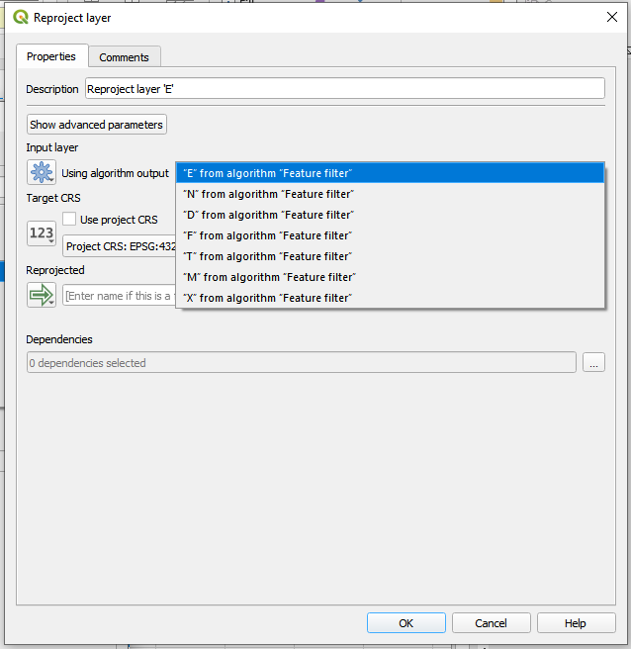
- In “Target CRS” select “USER;100028-TM AUSPOS”
